Setup Pixels How-To
Follow this step-by-step guide on how to implement the Conversion Pixel via API:
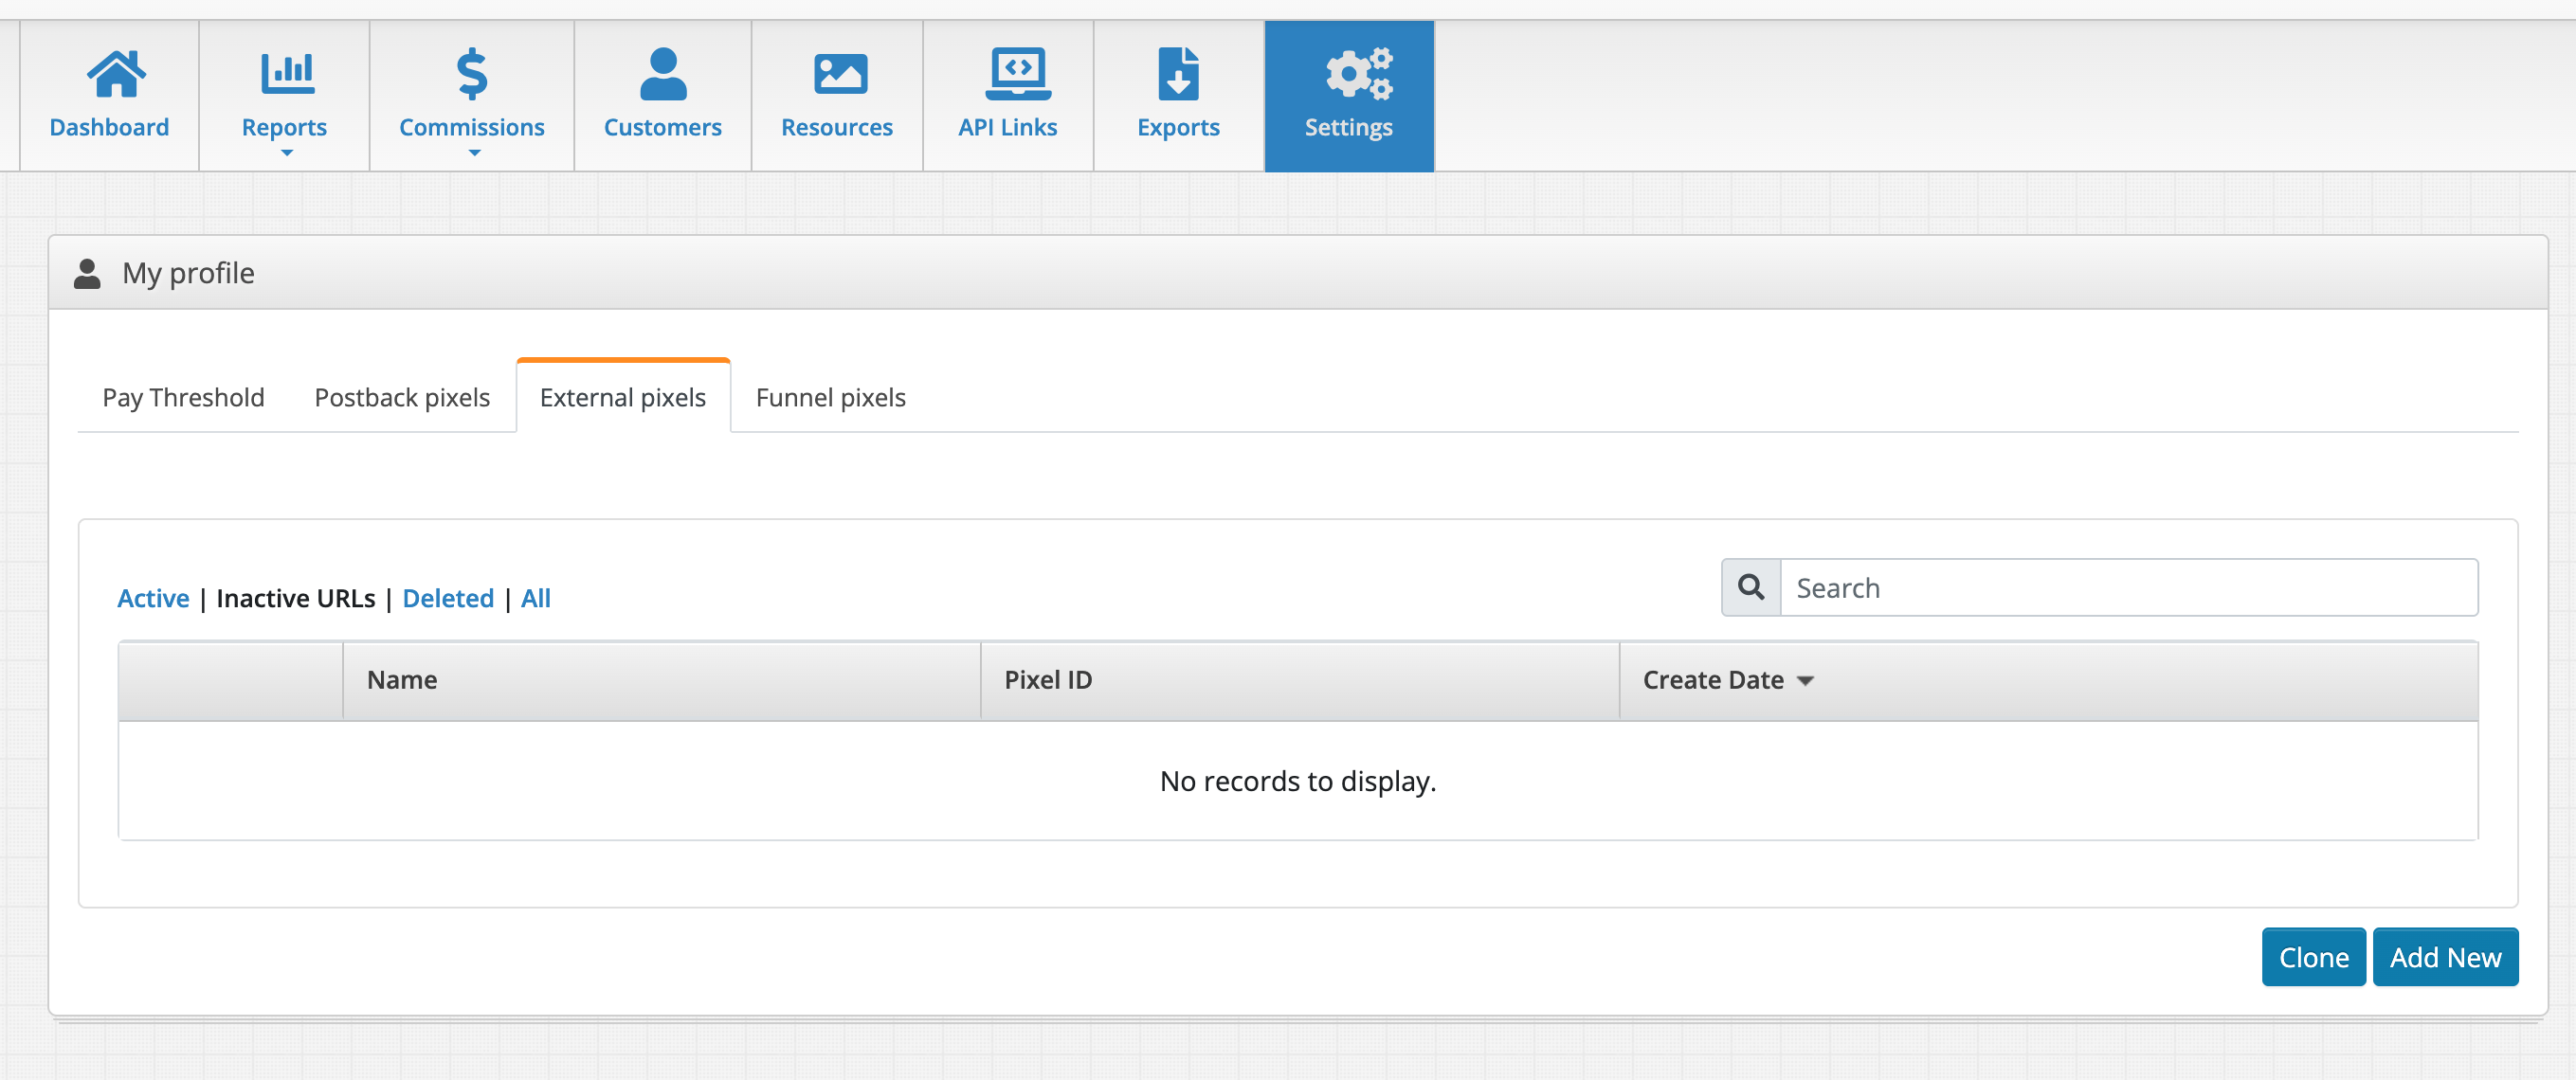
- Go to the backoffice and open your Offer Admin
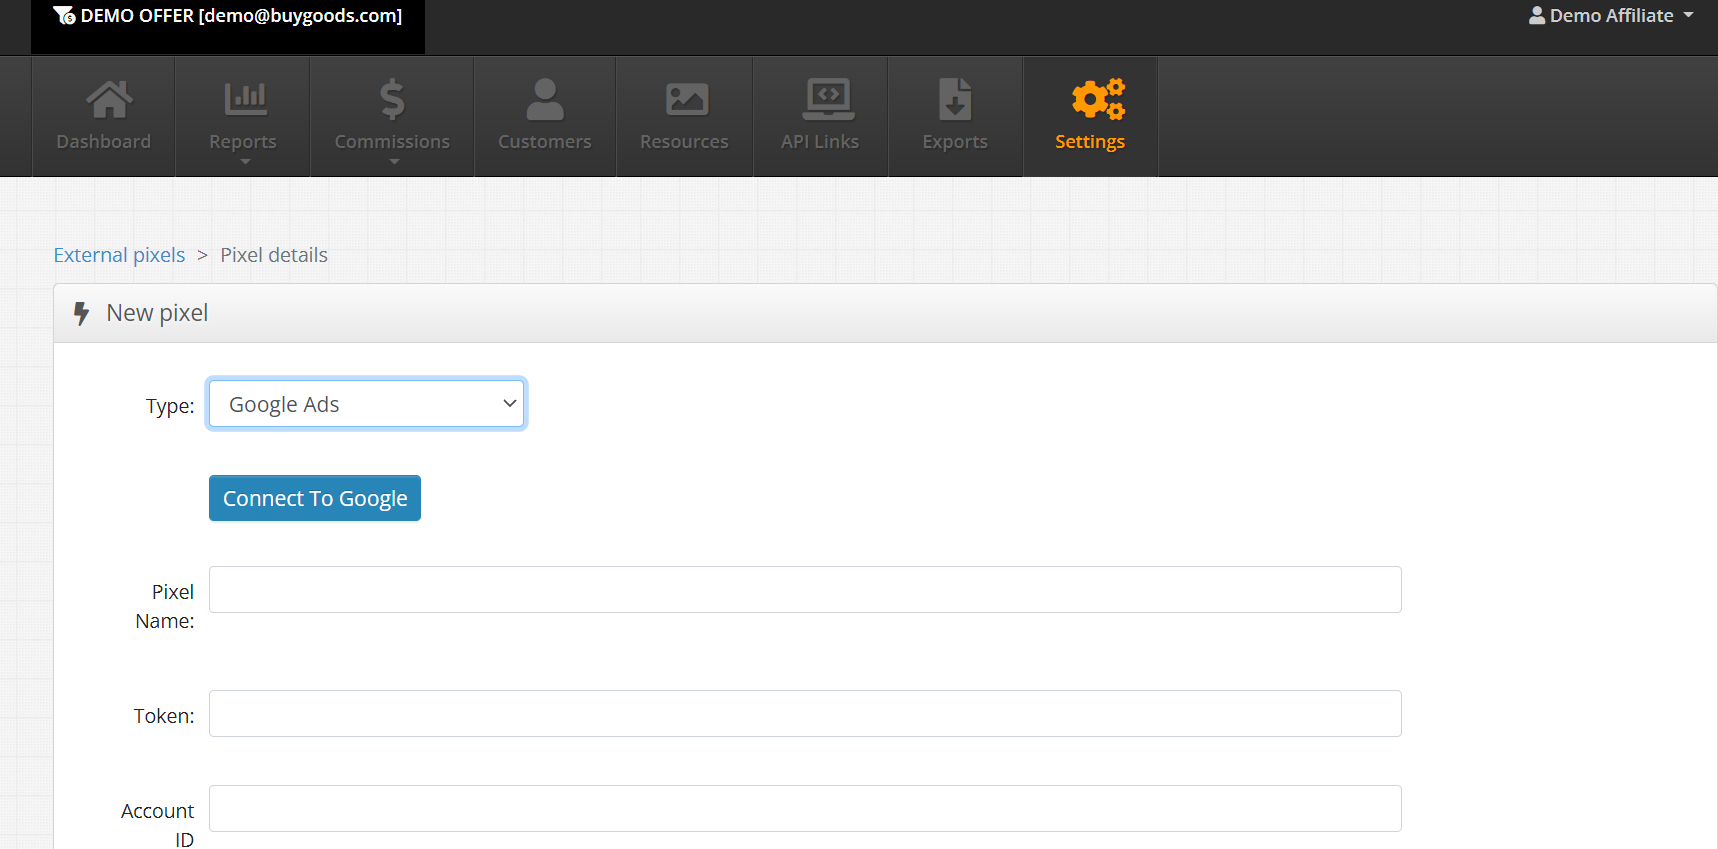
- Click on Settings and Choose the External Pixels tab and click on "Add New"
- Change Type to Google Ads
- If this is not your first Google Pixel, copy and paste the Token and Account ID obtained in the previous step (from the first pixel) then give the pixel a name that is meaningful to you, put in the URL and select Status as Active and the Event type as Purchase and Save
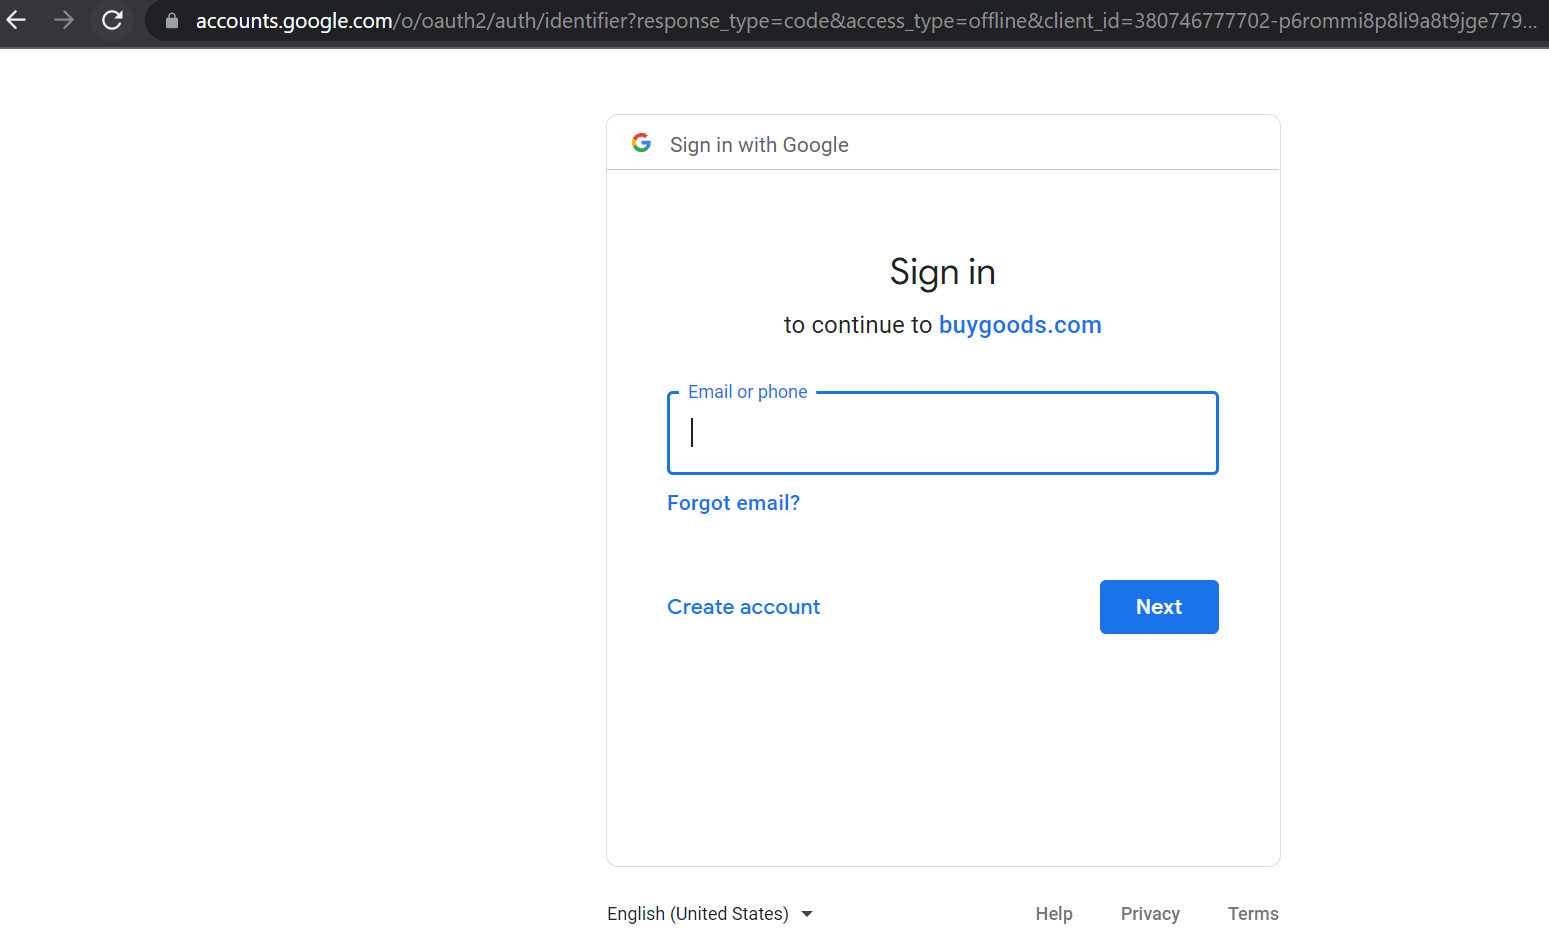
- If this is your first Google Pixel then click on the "Connect to Google" button, click on the "Connect to Google" button
- On the next step you will be redirected to a page where you will have to authenticate with Google
- Once you logged in and granted access to the request, you will get back to the Pixel Edit page and the Token and Account ID will be automatically filled in for you
- Give the pixel a name that is meaningful to you, put in the URL and select Status as Active and the Event type as Purchase and Save
- For the Google Ads tracking to work properly, we also need to send the
gclid*.
If you don't have an easy way of doing it yet, you can always use our method:
1. Paste the following code in your lander's footer<script type="text/javascript" src="https://buygoods.com/js/google_link_manager.js"></script>
2. Add the following parameter to your promo link - &ga=1 ( so your promo link will look something like - www.bgoffer.com?aff_id=10&ga=1 )
*Google Click Identifier - Automatic generated by Google


Go to the backoffice and open your offer's dashboard.
Step 2:
Go to the Settings tab and click on External pixels.
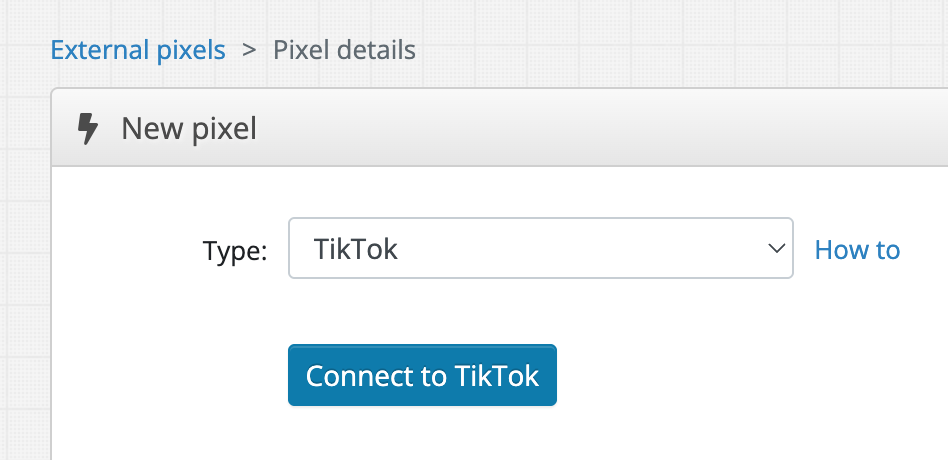
Step 3:
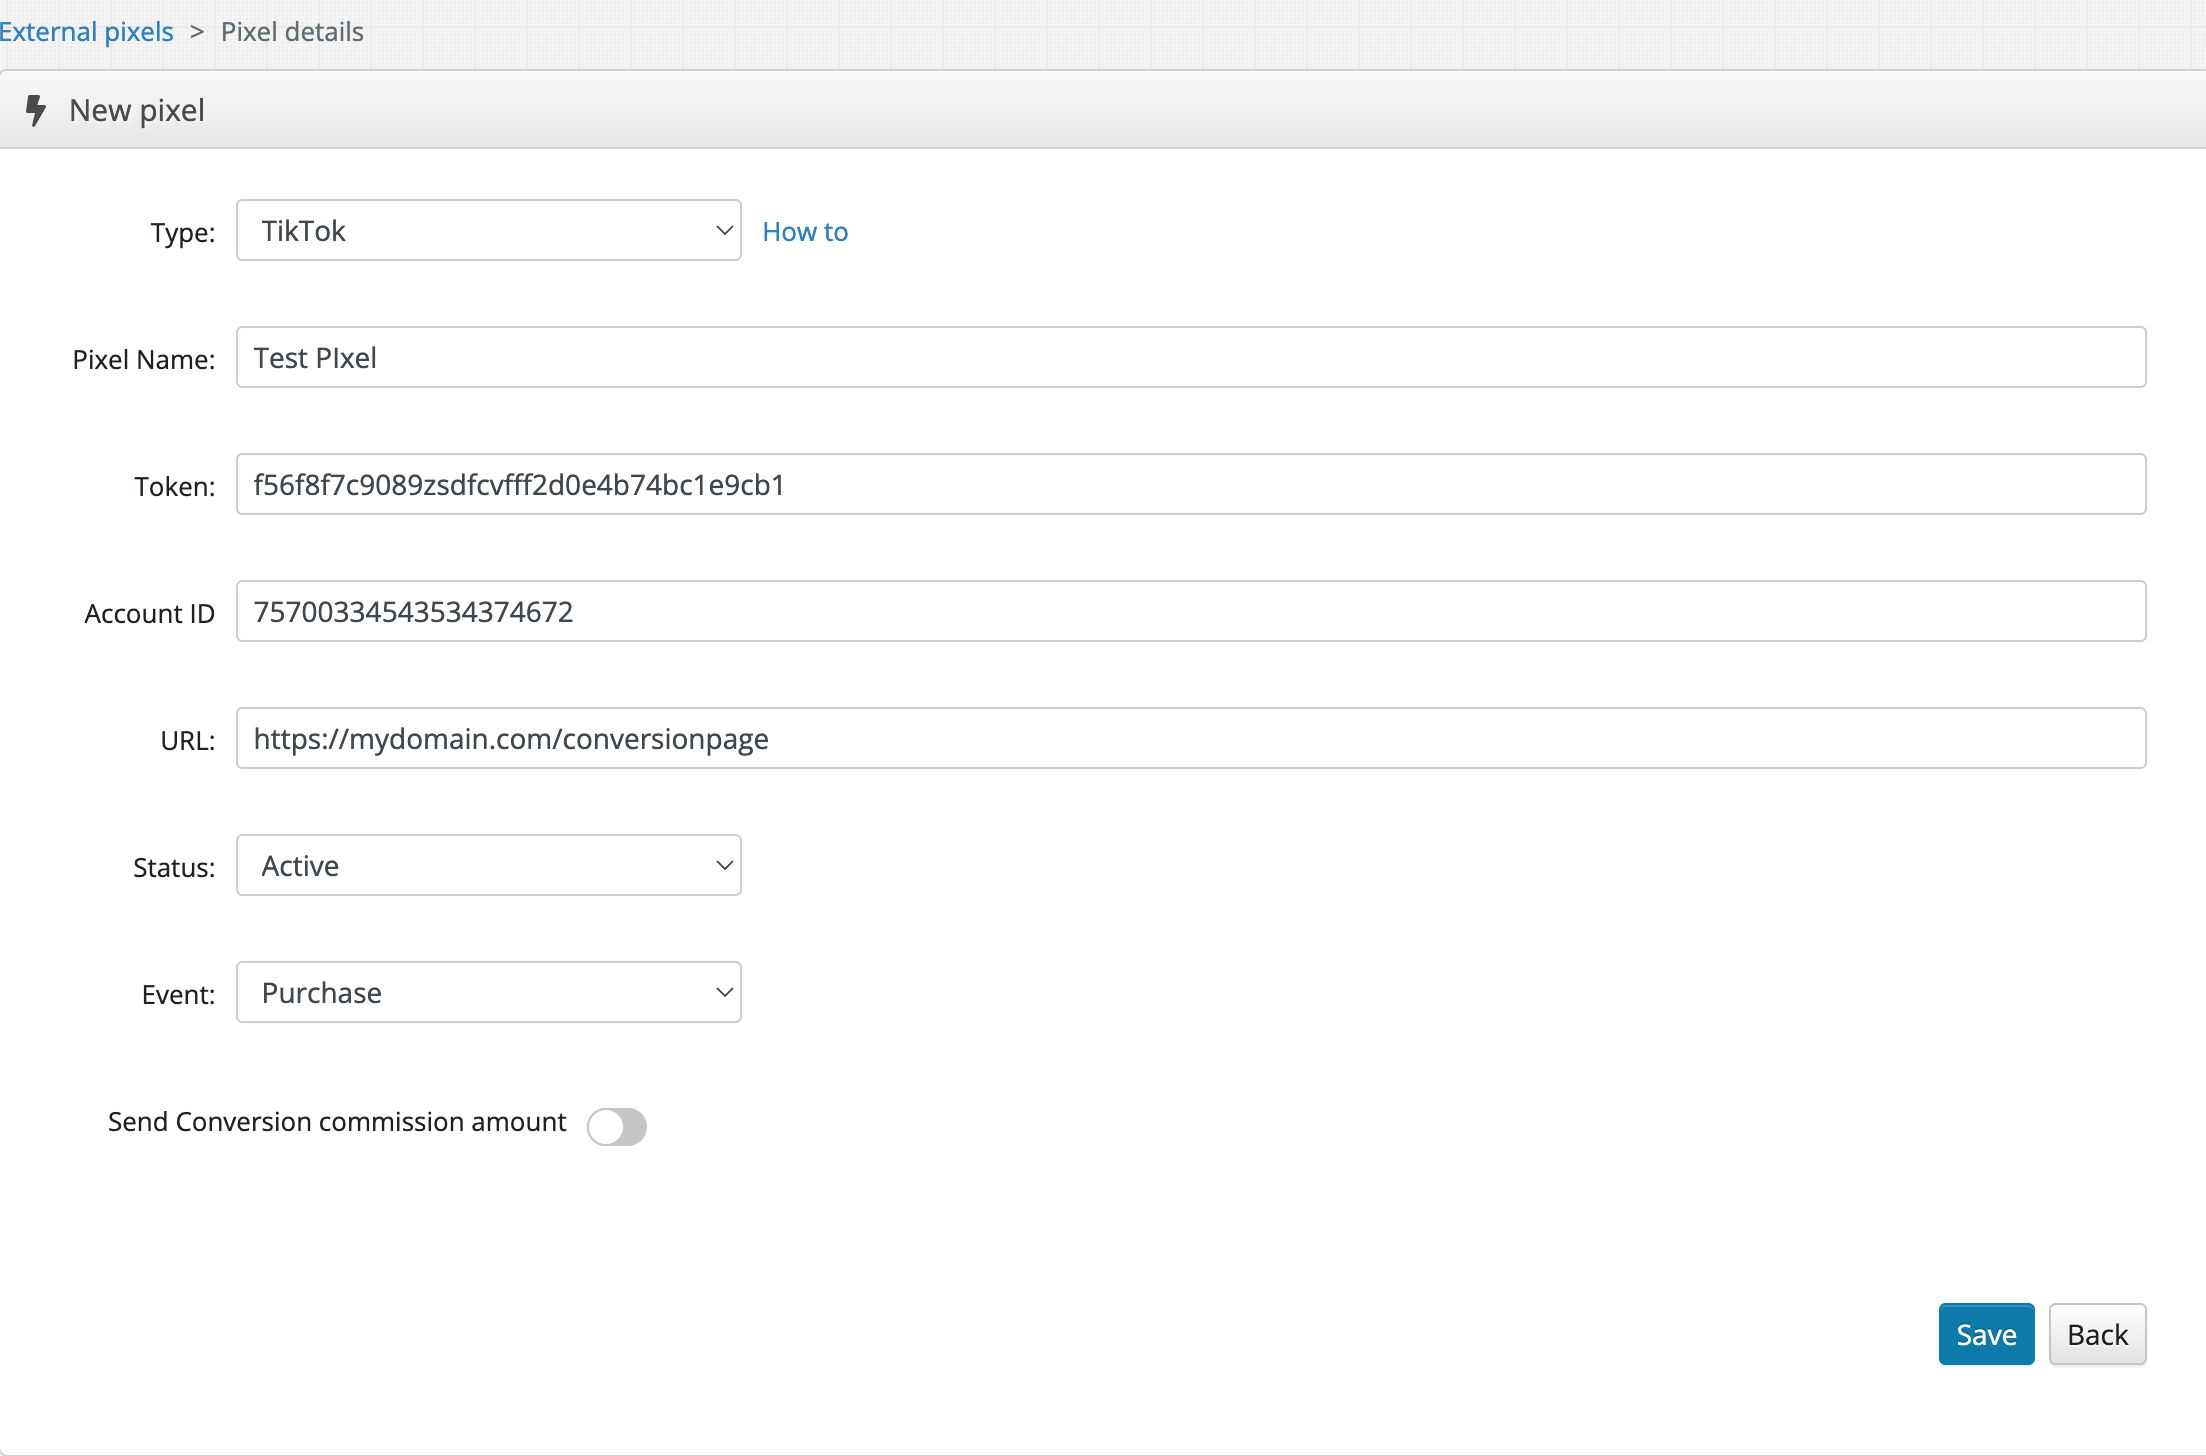
Click on Add New and change the tracking type to TikTok.
If this is not your first TikTok Pixel, copy and paste the Token and Account ID obtained from the first pixel then go to step 7
If this is your first TikTok Pixel then click on the "Connect to TikTok" button.
Step 4:
Click 'Continue' when you're asked for access rights.

Step 5:
Once you are logged in and granted access to the request, go back to the Pixel's Edit page and the Token and Account ID will be automatically filled in for you.
Step 6:
Give the pixel a name that is meaningful to you.
Add the domain URL where you want your pixel to fire
Select the Status as Active
Select the Event type as Purchase for tracking conversions.
Click Save.
Setup on your Landing Page
Step 7:
Update your page to capture the ttclid URL parameter and pass it forward to the BuyGoods traffic link. If you do not have easy access to manage your page, simply add the code below on your lander and append &tt=1 on the MaxWeb Inc tracking links from the page:
<script type="text/javascript" src="https://buygoods.com/js/tiktok_link_manager.js"></script>
Follow this step-by-step guide on how to implement the Conversion Pixel via API:
Step 1: Verify your landing page domain.
Step 2: Generate an access token for your pixel
2.1 - Using the Events Manager (Recommended by Facebook)
To use the Conversions API and generate an access token for it, you need to be an admin or system user on your Facebook Business Manager account and have a pixel created there.
How to set up a Meta Pixel
- Login to your Facebook Business account at https://business.facebook.com/ and go to the Events Manager page.
- Click on the Connect Data Sources and select Web.
- Add your Pixel name.
- Enter your website URL for which you have the domain verified.
- Select Conversions API and Meta pixel.
- Select Set up manually and go through the manual implementation setup (you can set up that later from the "Get Started" button when generating the access token).
Manual implementation setup
- Select View Content and Purchase events.
- Select the Event ID, Client IP, Phone number and the Email address checkboxes for Purchase and View Content events.
- Review and finish the setup.
- Place the pixel on the page where you want it to fire and make sure you see at least 1 visit in the Overview tab
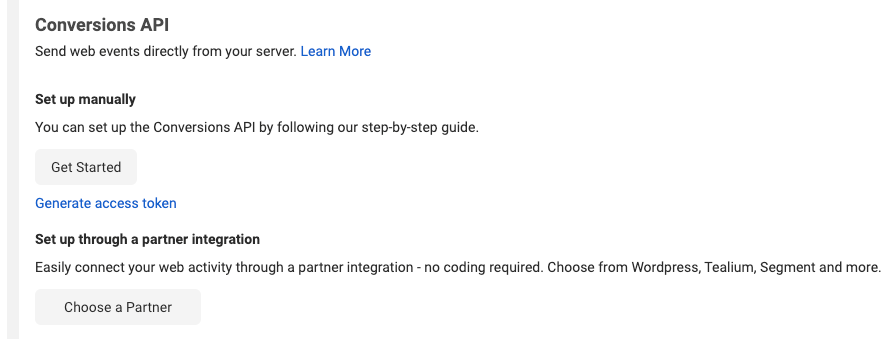
Generate the access token
The access token is passed as a parameter in each API call. Inside Events Manager, follow these steps:
- Choose the pixel you want to implement.
- Go to the Settings tab:

- Copy the Pixel ID and save it.
- Find the Conversions API section and click on the Generate access token link under Set up manually.
- Note The Generate access token link is only visible to users with developer privileges for the business. The link is hidden from other users.
- Once you have your token, click on the Manage Integrations
button in the Overview tab in Events Manager. In the pop-up screen, click
the Manage button next to Conversions API. This will
automatically create a Conversions API app and Conversions API system user
for you. There is no need to go through App Review or request any
permissions.

2.2 - Using Your Own App
If you already have your own app and your own system user, you can generate your token inside Business Manager. To do that:
Step 1 - Go to your Business' Settings.
Step 2 - Assign a Pixel to your system user (you also have an option to create a new system user at this stage).
Step 3 - Select the assigned system user and click Generate Token.
Your app does not need to go through App Review. You do not need to request any permissions.
Step 3: Add your pixel data in the backoffice
- Go to the affiliate backoffice and open your offer's dashboard
- Go to Settings -> External Pixels and click on "Add New"
- Select Facebook on pixel Type
- Give the pixel a name that is meaningful to you
- Add the generated token
- Add the Pixel ID
- Add the verified URL
- Select the Event type you need and hit Save
- For the Facebook tracking to work properly, we also need to send the *fbclid
parameter.
If you don't have an easy way of doing it, you can always use our method:
- Paste the following code in your lander's footer
<script type="text/javascript" src="https://buygoods.com/js/facebook_link_manager.js"></script> - Add the following parameter to your promo link - &fb=1 ( so your promo link will look something like - www.bgoffer.com?aff_id=10&fb=1 )
*Facebook Click Identifier - Automatic generated by Facebook - Paste the following code in your lander's footer